

How to Photograph the Night Sky
After sharing some photos from a recent stargazing adventure, I’ve been asked by a number of people how to achieve a great night photo of the stars. I am by no means an expert (if you want to see some really amazing shots, check out Brian Spencer!), but I am happy to share what I know.
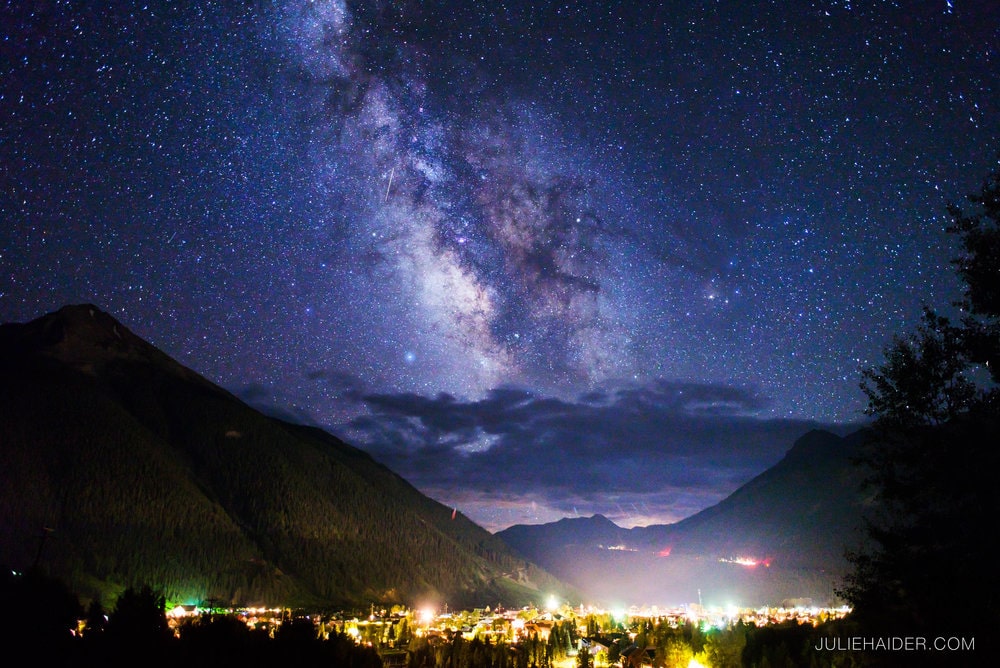
The Milky Way over Silverton, Colorado.
The good news is that you can get some pretty great shots with fairly basic equipment. You’ll need a DSLR, a tripod, and a nice wide angle lens (I use a 24mm f/2.8). Oh, and you’ll need a night sky free of clouds and light pollution. Added bonus if there’s something you can add to your shot’s composition like rocks, mountains, or a cabin.
Start with your camera secured on your tripod and position it to where you want to get your shot. It’s kind of hard to see what you’re pointing at sometimes (because, of course, it’s super dark), so I usually take several test shots and recompose until I’ve got the shot I want. If your camera has a self timer or remote function, definitely use that to avoid any camera shake from your hand pressing the shutter.
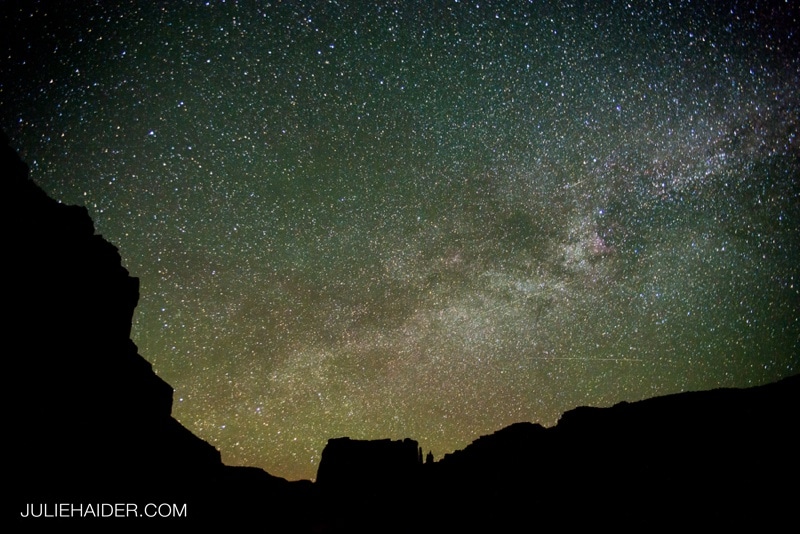
Desert rocks frame the Milky Way in Moab, Utah.
Set your aperture to be wide open – f/2.8 or whatever the lowest number your lens will do. You want as much light as possible to come in! It’s okay that you have a shallow depth of field because your subject is so far away that it will all be in focus. Also set your lens to manual focus and set it to the infinity setting (focusing as far out as possible).
When it comes to shutter speed and ISO, you’ll want to experiment a bit since the ambient light will be different for each night and location. High ISO’s are going to give you more grain in your photo. If you can keep the number down that’s awesome, but if you really need to bump it up, you can remove some of the grain in post production. I’m usually using ISO 2000 – 4000 depending on the situation.
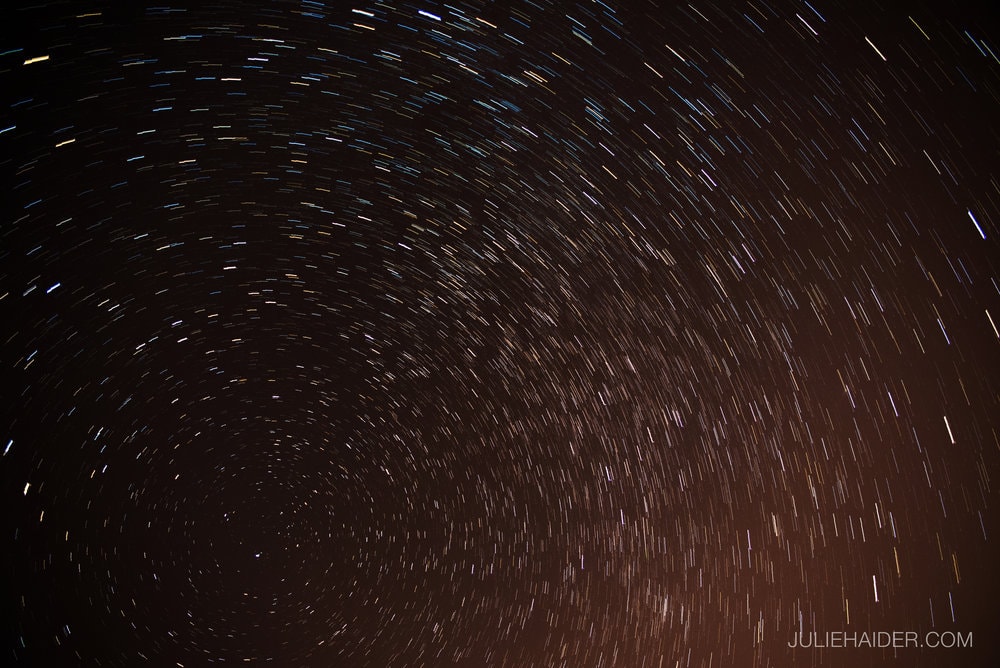
A composite of images to show star trails.
You want your shutter speed to be long enough to bring in plenty of light, but not so long that you start to get star trails. The trails occur when your shutter speed is long enough to capture the subtle movement of the stars. Star trail photos can be stacked to make stunning images, but you need some special equipment for those types of images. If you’re wanting the stars to look like pin points rather than arches, stick to a shutter speed of 15 or 20 seconds. I find that when I go to 30 seconds, I have a bit of trails.
So your setup will look something like this: a 24mm lens set at f/2.8 with a shutter speed of 20 seconds and ISO 2500. Manual focus set to infinity and your self-timer on. I should note that while a wide lens like 24mm is ideal, you can still do these photos with other lenses. You’ll just see a lot less of the sky in your shot, so you’ll have to pick your spot wisely.
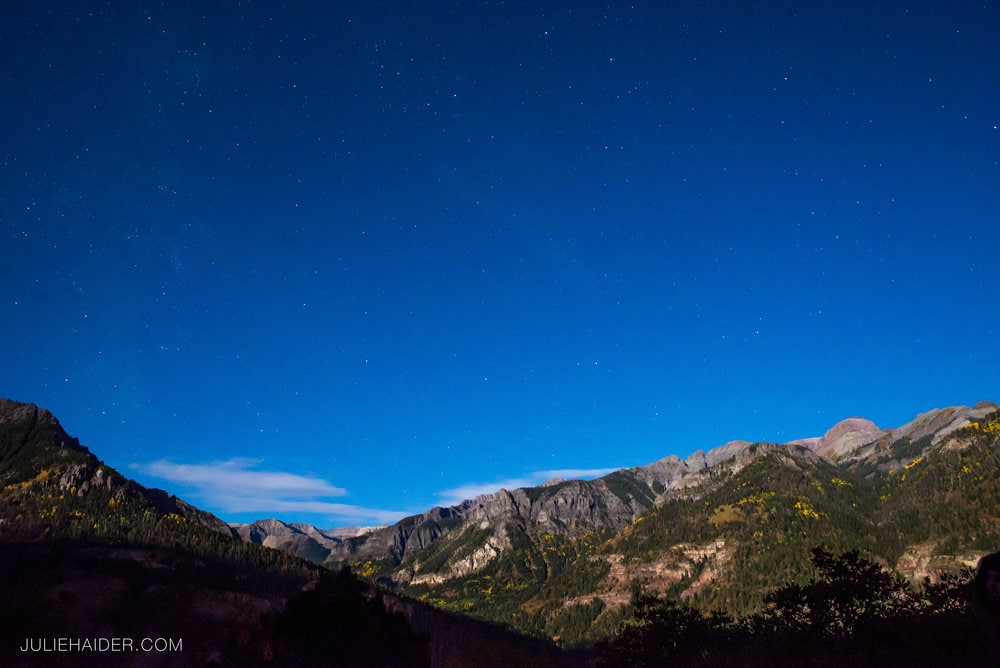
Ouray, Colorado’s night sky with a full moon.
Experiment with your shots and have some fun! Find the Milky Way or your favorite constellation. Add some interest to the photo by including surrounding scenery. Just have fun with it and enjoy the view!
PS – I do my post production in Lightroom and Photoshop. I start with basic edits in Lightroom: cropping/horizon straightening, color correction if needed, exposure, and contrast. And plenty of noise reduction by adding luminance. Then if I think the photo could use a little extra “pop,” I’ll pull it up in Photoshop and play with the curves and contrast to add crispness and vibrance.


…
Hey, friend! I’m Julie – an adventure wedding & elopement photographer who loves the outdoors and traveling! My photography is fun and heartfelt while highlighting the beauty of love and nature. I’m based in Albuquerque, New Mexico, but wedding photography takes me throughout the southwest, to national parks, and all over the world! To find out more about destination wedding photography, check out my travel page. And if you want to get some great elopement planning tips, check out planning and advice section of the blog.
…
Leave a Reply

Julie Haider is an adventure elopement photographer & planner based in New Mexico and photographing destination elopements worldwide.
Mountain Elopement Guide


Adventure Elopement Ideas
Free Elopement Packing Checklist
New Mexico Elopement Guide
How to Elope
elopement Planning tips & Guides:
Contact me
Destination Elopement Photographer
Elopement Packages & Pricing
Elopement Photography Info:
@juliehaider
View More adventure elopement photography on Instagram
© Julie Haider 2014 - 2026 | Terms & Privacy Policy
So many great tips! Can’t wait to try this out!
This great! Thanks for sharing!
This is awesome! I’m definitely saving this post to refer back to. Thank you for sharing this!
Wow, thanks, Julie! I am going to try this when we go to Utah in September!
You definitely should! The second photo and a couple of the ones at the end were taken in Utah. It’s a great area to get star photos. I can’t wait to see what you come up with!